
Instead of getting a pattern I decided to copy shorts I already own and feel comfortable in.

I used the pair to make a paper pattern (using the pages of the past months of my wall calender) copying the form and size of the pieces plus seamallowance.

Now it's time to trace the pieces on the fabric once, then flip the pattern over and trace a second, mirrored piece. If you have directional fabric as my stripes, pay attention to cut all pieces in the same direction.
The last piece needed is a 6 inch wide strip for the upper border.
First take the two leg pieces and iron the lower edge for 1/4 of an inch towards the inside.
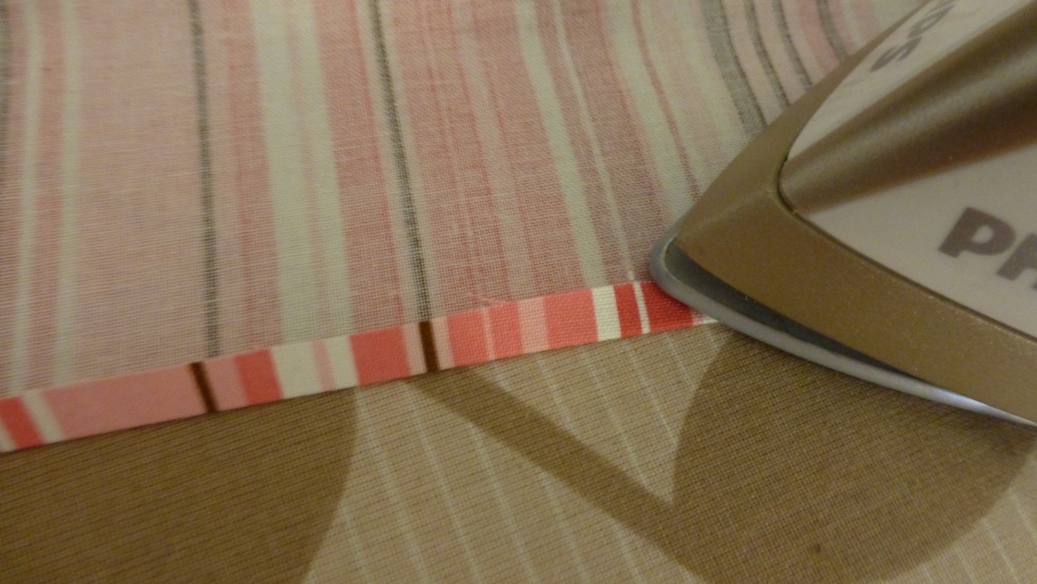
The turn the folded edge over another time, ironing a hem of about 1/2 an inch towards the inside of the fabric so that the raw edge is hidden inside the hem.

Now fix the seam by sewing straight along the inner edge of the hem.

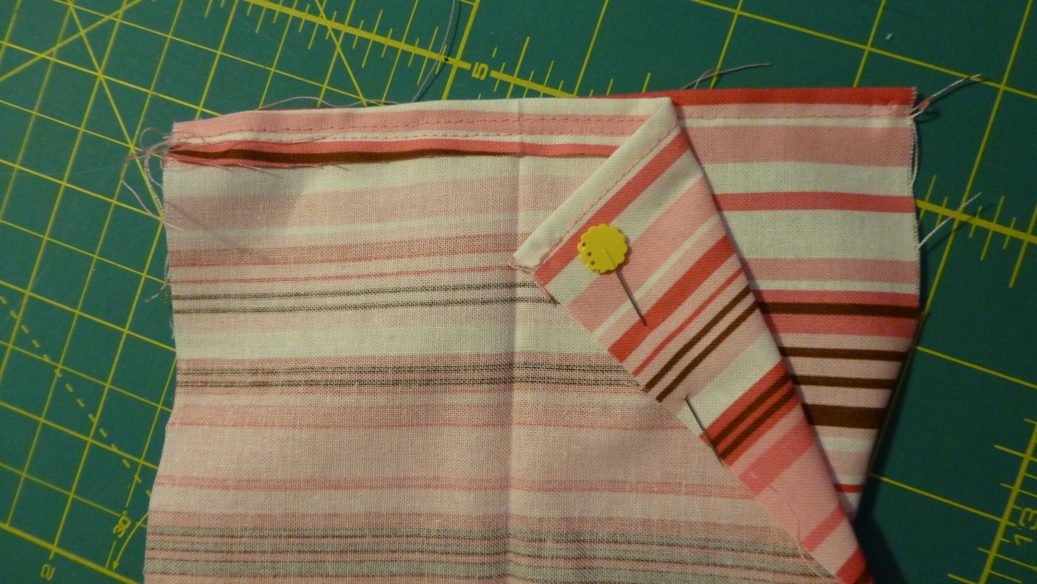
The next step is to close the single leg, joining the two edges forming the inner side of the leg as shown below.

Once the legs are closed, the two legs need to be joined to form the body of the shorts. Sew a straight seam where pieces are pinned together. The upper picture shows the back, the lower picture the front part of the shorts.


Now we need to prepare the upper border. Measure the circumference of the upper edge of the shorts and prepare the border strip of the same length considering seam allowance on both edges where a hem has to be sewn as shown in the picture below.

Then iron the strip in half lengthwise.

Turn the strip into a closed circle joining the two hemmed edges for about 3/4 of their length, leaving approximately 1/2 of an inch open (this is where the drawstring will go).
The next step is to attach the border to the shorts. Pin the border in place all around the upper edge of the shorts, making sure the open part of the seam as shown above is on the outside of the front of the shorts.

Sew all around the shorts attaching the border to the body of the shorts.

Turn the border over and and the shorts are almost ready. Now take the drawstring and insert it into the border through the opening at the front using a safety pin as a guide.

Draw the string all the way throught the border, get the safety pin out and you're finished.
And this is your shorts will look like:

Have you made a project following this tutorial? Let me know what you think. Did you like it? Was it easy to understand and to follow? Do you have any suggestions?
Write a comment or send me an email using the contact form at the bottom of the page.
-->
No comments:
Post a Comment